
Winnipeg Cycle Chick’s Healthy Homemade Hippy Bars
 You may find this hard to believe, but in between cocktails I am pretty particular about the kind of food I put into this well-oiled* machine I call my body. Nutrition is an important part of training, and lately I have become increasingly aware of the extra sugar and unnecessary crap that comes in most over-the-counter energy bars.
*100% potato chip oil
I am also consistently appalled at having to shell out ridiculous amounts of cash for energy bars – money that would be far better spent on life’s necessities, like carbon fiber bottle cages.
Over the winter, a top-secret lab at Cycle Chick Headquarters was transformed into a test kitchen for the purpose of trying out energy bar recipes garnered from sources far and wide. An army of dedicated soigneurs toiled tirelessly to find a recipe that was the perfect blend of tasty, nutritious, easy to make and portable. I guess they got sick of cleaning my jerseys with pockets full of melted chocolate.
 Hey! You, in the fourth row – back to work!
I like this recipe for the taste and texture – not too sweet, dry or goopy. I also like the fact that it is extremely customizable with whatever you happen to have in the house – within reason of course. The soigneurs reluctantly agreed to share the recipe. They said it was so easy, even I could do it. Whatever.
Ingredients:
2 cups of your choice of sweetener/binder:
(maple syrup, corn syrup, brown rice syrup, or Blue Agave Syrup) 4 cups large flake oats
 4 cups cereal
of your choice (go nuts, but maybe stay away from Fruit Loops or Count Chocula)
4 cups cereal
of your choice (go nuts, but maybe stay away from Fruit Loops or Count Chocula) 3-5 cups hippy fillers of your choice:
(eg. nuts, raisins, currants, coconut, flax seed, pumpkin seeds, dried cranberries – a handful of chocolate chips makes it feel a bit naughty) 1 ½ cups all natural peanut butter (Natural, only because regular peanut butter has a bunch of added sugar and we’re trying to cut that shit out)
 3-5 scoops chocolate or vanilla protein powder (optional)
salt to taste
1) Put the sweetener and peanut butter into a saucepan. I’ve tried all of the sweeteners and have to say I like the brown rice syrup best. Until recently I didn’t know it existed, but like honey or maple syrup, it is a natural sweetener – unlike agave syrup or nectar, which, in spite of all its organic hippy claims, is a highly processed form of fructose.
The thing about natural peanut butter is that it doesn’t contain the additives that keep the oil mixed in. So when you first open the jar it will have a layer of oil on top.
Gross. You’d think that considering you just paid eight dollars for a jar of fucking peanut butter, the least they could do is stir it for you.
A good tip from the Gospel According to Martha: when you’re measuring out something sticky, give the measuring cup a good blast of non-stick spray first. Your soigneurs will thank you later when they have to do the dishes.
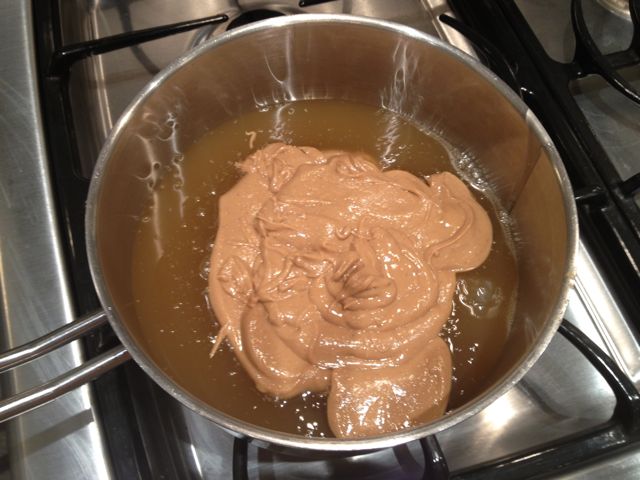
 2) Gently heat the mixture over medium heat, giving it a good stir once in a while so it doesn’t burn.
 You may be tempted to stop here and just eat this as is. Try to resist.
3) Combine the remaining ingredients in a large mixing bowl – oatmeal, cereal, and your selected hippy fillers. I used a combination of muslix, puffed brown rice, almonds, pumpkin seeds, coconut, raisins and flax seed.
 I bet your cholesterol dropped just looking at that picture. Feel free to experiment with adding other things. I used to chuck in a few scoops of chocolate whey protein, but my boobs did not get any bigger so I stopped.
4) Combine the hot sticky stuff with the dry hippy mixture. I do this right in the pan, which has also been given a healthy blast of non-stick spray.
 Start mixing them together with a wooden spoon, otherwise you will burn the shit out of your hands like I did. The soigneurs must have forgotten to warn me about that.
 At some point you will need to switch to your hands to really get everything worked together. I won’t lie, this part is messy. Not as messy as cleaning your drive train in white leather pants – but certainly stickier.
 5) Make it flat. Once everything is mashed together to your satisfaction, start to pat it firmly down into the pan with your hands. Get it as smooth as you can, then use a piece of wax paper to really get it flat. This part is hard because while cyclists have large, powerful legs, they have wimpy and underdeveloped arms, kind of like a tyrannosaurus rex. Rest often, or as needed.
 I have a small cutting board I use to finish the job.
 Voila! Nice and flat and even.
 6) Put the pan in the fridge for at least an hour or two to firm up. That’s just about enough time to do a hard interval workout, or perhaps give your legs a nice, close shave.
 7) Cut into squares. Since I usually make these at night, I leave them in the fridge until morning. Which is good, because cutting the chilled squares will once again tax your poor little t-rex arms and you’ll need the recovery time from #5 above.
 If you cut them into 2 inch squares you should get 24. Each square has about 250 calories and 40 grams of carbohydrates. I have no idea how much they would cost, but I will assume they are less than the highway robbery of store bought bars. And you’ll know exactly what’s in them, even if it’s amaretto and cat food.
 I wrap up each one in some wax paper and put them in a tupperware container. This way I can keep them in the freezer and grab them when I need them for pre or post ride or workout – or to shove in my jersey pocket for along the road.
 The offspring like them too, probably because they don’t know they’re healthy. Keeping them frozen also ensures they don’t disappear too quickly, because they are hard as rock and completely inedible until at least partially thawed.
So there you have it. Cycle Chick’s Healthy Homemade Hippy bars. Give them a try, I’ve even made a handy PDF version of the recipe you can download here:
Holy shit! Look at this mess. Thank goodness for soigneurs.
Awesome blog. And tasty bars as well. Yes, I was naughty and added dark choc chips to help lower my bp even more. Thanks for laughs. Alas no soigneurs for the dishes, may I borrow yours?
Of course CR. Mi soigmeurs es su soigneurs.
These look absolutely “num-a-num”! (And two thumbs up from a sport nutritionist’s point of view). These are definitely on my long weekend “to do” list. Can’t wait to try them (even if it means getting my fingers all gooey in the process)! Thanks for sharing!
Awesome!!! That is high praise indeed. Let me know what you think and how yours turned out. I’d love to know what you put in yours!
Love the additional commentary not typical in a boring old recipe books. I have 5 kids, you mentioned off-handedly there might be a boob enhancing secret ingredient, can you post that? Although so many of my peers gained vast volumes in their cup size post babies and worse they got to keep it beyond the nutritional needs of their infants I was not as blessed. I can say though that in addition to the upper volume they also seemed to amass a much larger lower volume as well, I did not. So perhaps I was not so unblessed after all. Back to my true question… did you in all those test trials come across a substitute for the peanut butter at all? With peanut free restrictions everywhere particularly in my kids schools this would not be a welcome lunch box alternative. Our home is not peanut free at all. I actually encourage the family to eat nuts but its seems an alarming amount of people are allergic to nuts or even fruit and air – I honestly don’t know how they have made it to school age. My apologies for being so politically incorrect.
No apologies needed. I certainly have my opinions on that as well. It is a miracle our (and previous) generations survived the perils we must shield our babies from today. Air included. Yeesh…
But… if the school is just “peanut” phobic, you can use almond butter for sure. If they are completely “nut” phobic, then I might suggest trying apple butter, or soy butter as Nettie suggests. I have not tried either, but I think this recipe is so forgiving you could use almost anything of similar consistency. Let me know if you try it and if it works or not.
Five kids. Woman, you deserve a medal. Probably five.
Please provide printable version of said recipe. I am too lazy to write it down – besides I am having a cocktail.
Re printable version of recipe – look above the last photo – Hippy Bar recipe pdf. perfecto!!
Buy the “just peanuts” PB at Bulk Barn, and save buying the $8 per ounce “Orgazmic” poop.
I prefer the #1005 Crunchy… And so do your offspring.
there is the soy butter that looks like peanut butter that might work as a substitute – I haven’t tried it though. I love peanut butter and any recipe with it in there is a guaranteed success for me!
Dear Winnipeg Cycle Chick
Love the recipe but since I don’t cycle, when I finished making this I realized I needed a manicure!
I used the Puffed Wheat and Peanut Butter Granola instead of Muesli – will let you know how LaDeux likes them!
The Princess
[…] The Hippy Bars I made for the trip […]
[…] the common cold or slightly worse, and get my mid-race snacks lined up (this morning I made some Hippy Bars), I’ll be good to go. Bring it. 44.929456 -93.115984 Share this:TwitterEmailFacebookLike […]
[…] Hippy Bars were a hit, on yet another trip. Winnipeg Cycle Chick […]
[…] 6. Winnipeg Cycle Chick’s Healthy Homemade Hippy Bars If my statistics are to be believed, cyclists (and runners and hikers…) around the world have embraced their inner flower child and pillaged the Safeway Hippy Aisle to make this simple recipe. Many people shared this recipe on their own blogs, and I had lots of people tell me about their own special variation on the Hippy Bar. My favourite by far was Colin’s version that uses organic honey from Ginger and Luc’s pet honeybees. It doesn’t get hippy-er than that my friends. […]
[…] back to the recipe… CycleChic’s is better, and much more entertaining, but here is what I […]
[…] and Dave were there looking all adorable in their matching fat bikes. Dave reports that the Hippy Bars are working their magic and are just as good frozen solid.Charles walked away with the Best […]
[…] for assembly are here. I use an 8×8 pan for this half-batch, and cut it into 16 […]
Kudos for the fantastic & yummy recipe. I have been looking for a good hippy bar recipe for eons, so thanks for sharing. I concur that tyrannosaurus rex arms are not suited to cutting these dense babies up. I discovered that if you rest the butt of your knife against your shoulder and really lean into the knife, cutting is made much easier and you get a bit of a core workout too!