
The Guerciotti Project, Phase 3: A Headset with a Coke Chaser
 As you might have figured out by now, this bike is not going to be the all-weather work-horse commuter bike that I intended it to be. No, this bike (which has now garnered nicknames like “The Princess Bike” and “Purple Fantasy”) is shaping up to be a classic Italian road bike, the likes of which any Italian worth their Pradas and pecorino would be proud to ride. Until, of course, it falls to pieces.
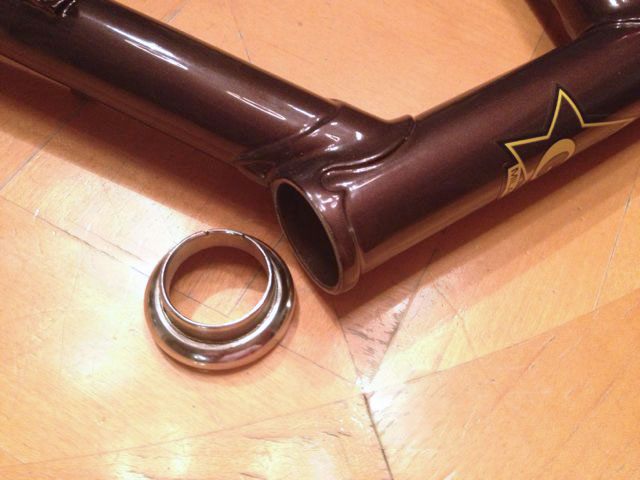
With the fabulous purple powder coating done, the next step was to “face and chase” the frame, a process that cleans the overspray from critical contact areas and threads – specifically the bottom lug where the bottom bracket goes in, and the head tube, where the headset (and eventually stem and handlebars) goes. One needs special tools for such an operation, and since the tools I have aren’t good for much more than a manicure, I made my way to Olympia, beer and bike in hand, for some old-school Italian loving.
 That’s right Adrian. You know how I like it.
That done, I was finally able to start putting things back together, starting with the headset. The headset is basically a jumble of rings and bearings that all get mashed and screwed together to hold the fork onto the frame.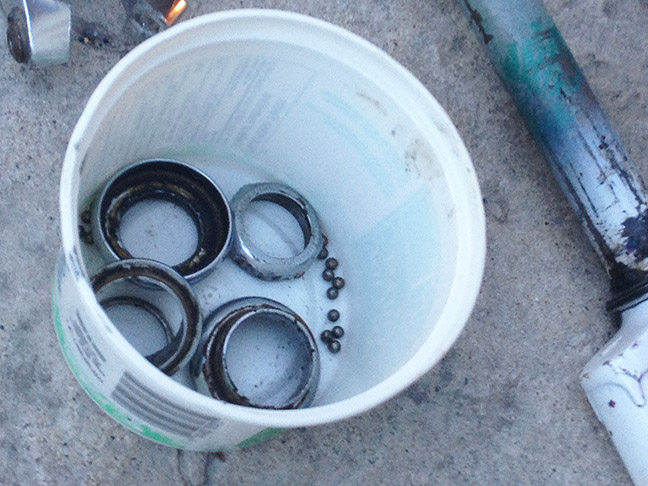 When Brad The Impaler helped me take it out, the loose bearings scattered all over the floor of his garage. While horrifying, it is apparently entirely natural, and the bearings would need replacing anyway. Equally horrifying was the thought of greasing and reinstalling a million tiny bearings when the time came to reassemble the headset. Thankfully at some point in time, some genius engineer put their powers to good use and invented cages that hold the bearings so they don’t fall out all over the garage floor.
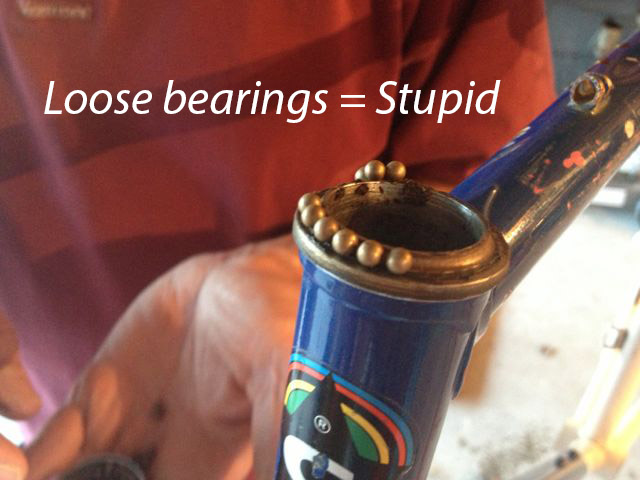
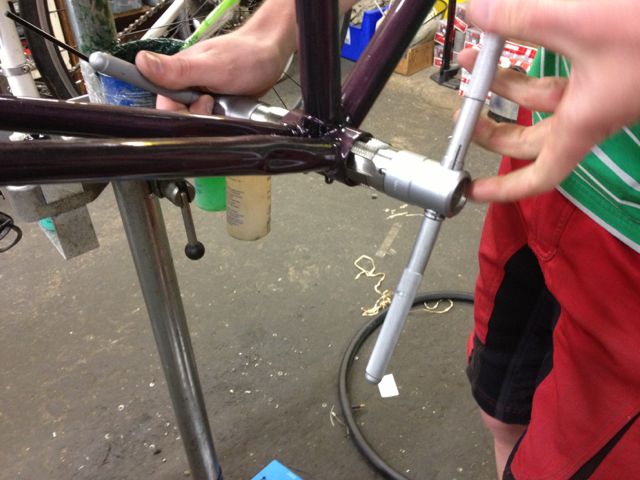
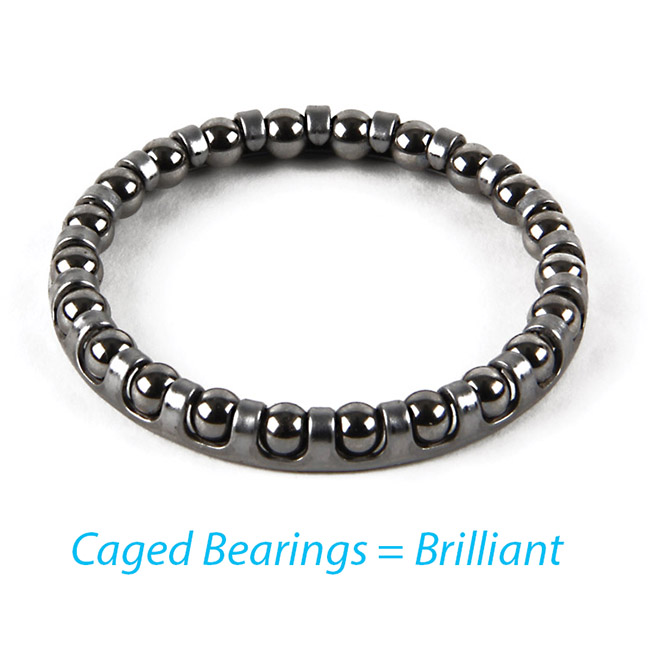 The good people at Natural Cycle found me the appropriate set of caged bearings and I was ready to put the headset back together. But then I found out that I first needed to press the cups into the head tube – an operation that required the use of a specific tool. So, you guessed it, back to Olympia with the frame, cups, and more beer.
It was at this point we discovered that something was awry (a fancy term for fucked) with the bottom cup. The cups should be very tight in the head tube, which is why you need the special press to put them in. My bottom cup was so loose (how loose was it?) you could just place it in with your bare hands and pull it right out again. This, to put it mildly, was not very good news.
It’s a good thing there isn’t a Strava for bike builds.
I left the store and spent the next week doing research and exploring my options – which is really nice way of saying I made a pain in the ass of myself asking every bike geek I know what they would do. One option was getting an entirely new headset, but that just sounded like a waste of good beer money. Another option included the use of an adhesive like Loctite or J-B Weld to secure the cup into place. That seemed a bit too permanent, and I’m not big on commitment.
Someone else suggested a radical solution involving cutting small, metal shims out of a pop can to place between the cup and frame. Of course, this was the perfect solution – and most certainly the one that this guy would choose.
 Here’s what I did:
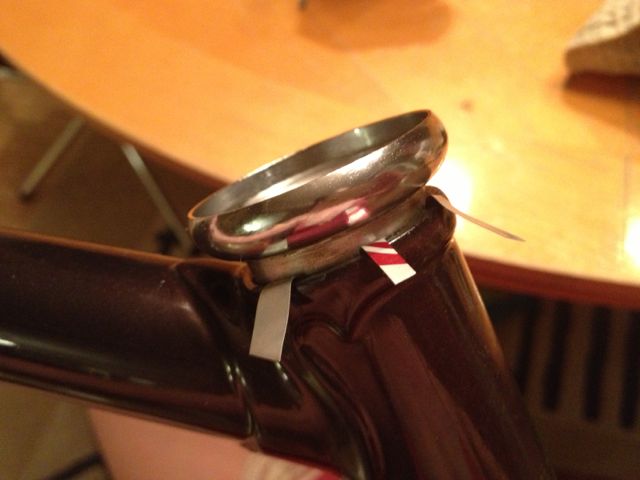
First I painted my nails a nice Bianchi celeste since it was the most Italian colour I had.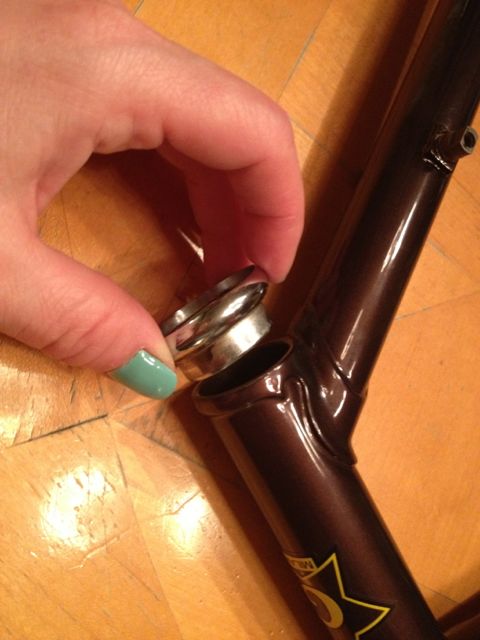 Next, I found a can of Coke in the recycling bin. I would have used Italian beer, but if I was going to buy Italian beer, it would be wine.
 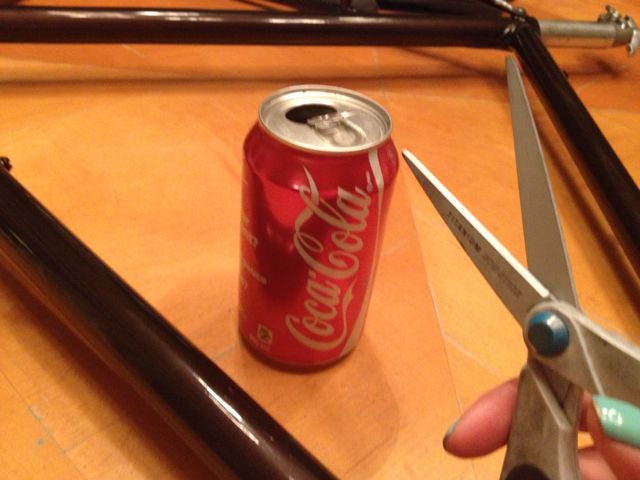 I cut a bunch of pieces about 1/4″ wide x 1″ long.
 Then I slathered the inside of the head tube with some really sticky grease and placed the shims evenly around the inside, like so:
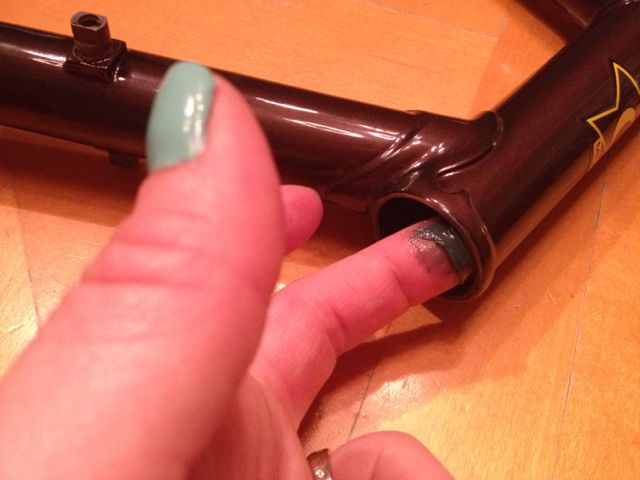
 With the shims in place, I carefully placed the cup into the head tube and pressed it into place.
 That part was tricky, since the shims were all greasy and tended to slide around all over the place. But MacGuyver said it looked good and LET’S GET OUT OF HERE BEFORE THE WHOLE THING BLOWS!!
Just kidding. He didn’t say that last part.
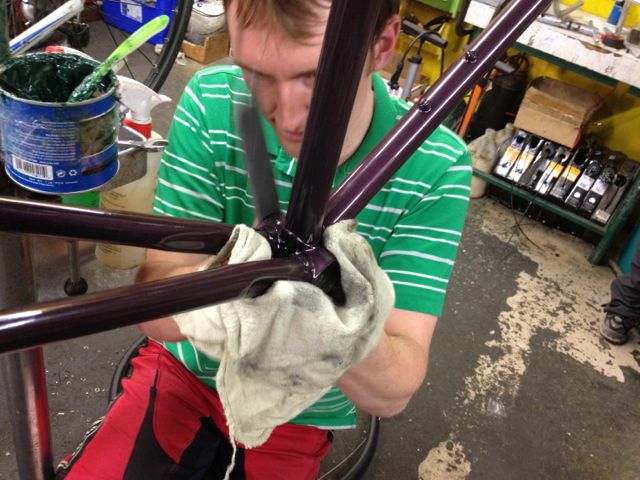
And finally, I cut the excess off with a utility knife, being extra careful not to fuck up the powder coating or my manicure.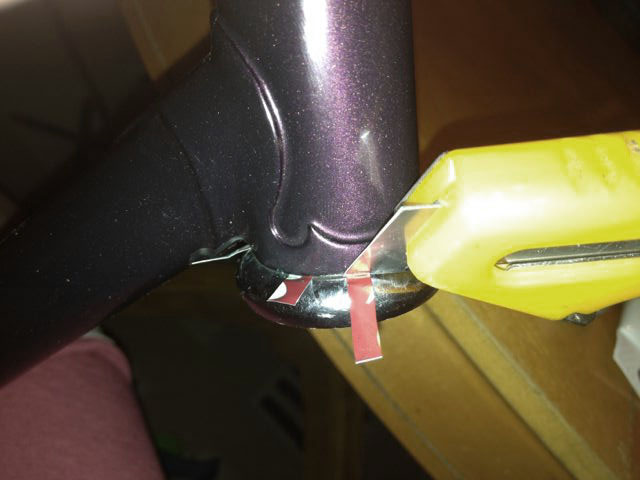 Whew. That was hard.
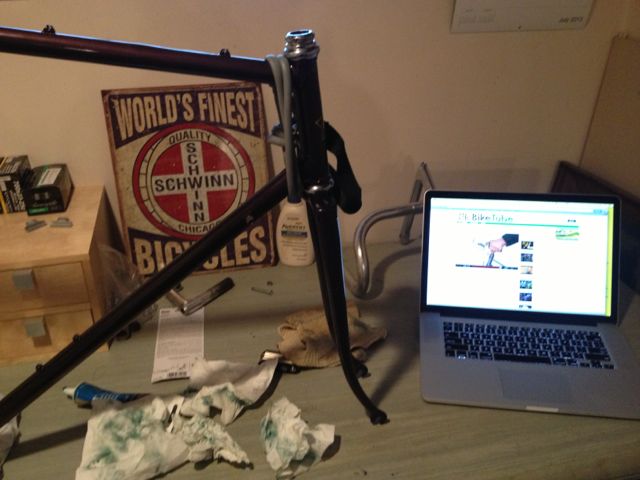
Now I was ready to assemble the headset. I watch this tutorial about a million times, and basically did exactly what the guy told me. While assembling a headset may be confusing and hard, following directions is easy. Especially if you watch them a million times.
 Ta daaa!
 Then I had to bring the frame back to Olympia again to have it tightened and adjusted since I don’t have the tools for that either. If the mechanics at Olympia become alcoholics, I may be partially responsible.
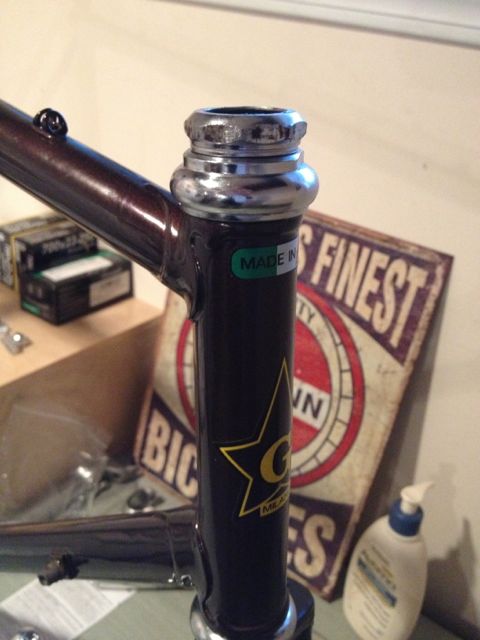
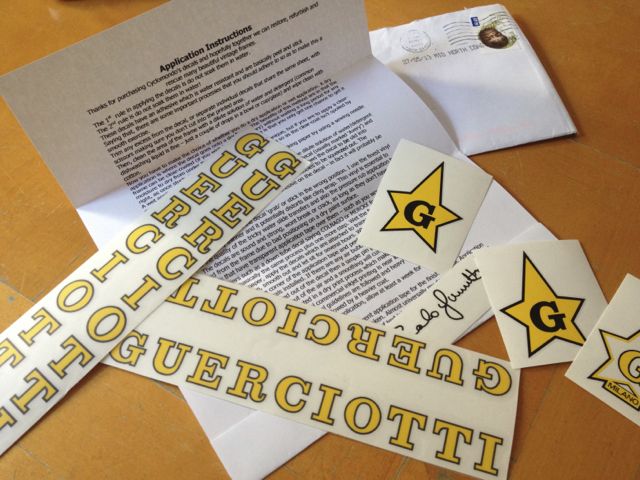
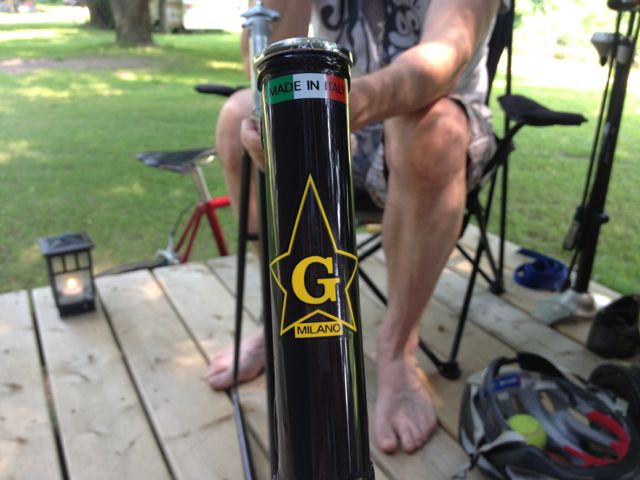
You might have noticed that some of the decals are on. They are from Cyclomondo in Australia, and they are fantastic. I got them for my birthday from Brother Al and could not wait to apply them to my newly minted frame.
 That was a mistake. With all of the galavanting around with the frame, one of them got scratched, prompting all sorts of pouting and inappropriate language. So the rest will wait until more of the bike is together and there is less galavanting. Waiting is hard.
Stay tuned for the next exciting instalment, tentatively titled “What the Fork?”, where I get a nasty surprise about my steer tube.
Looking Awesome!!!! i am definitely doubting that bike will ever see the snow!
What the fork is right!! You might be interested in the Low German sound-alike for this as well…. “Walter Falk”
The Pavement Princess looks fabulous! I’m still way faster though…
Makes me miss my old Guercotti. And now, I’m thinking every tutorial should start with the application of nail polish. Classy.