The Guerciotti Project – Phase 1: Booze, Blowtorches & a Bunch of Hammering
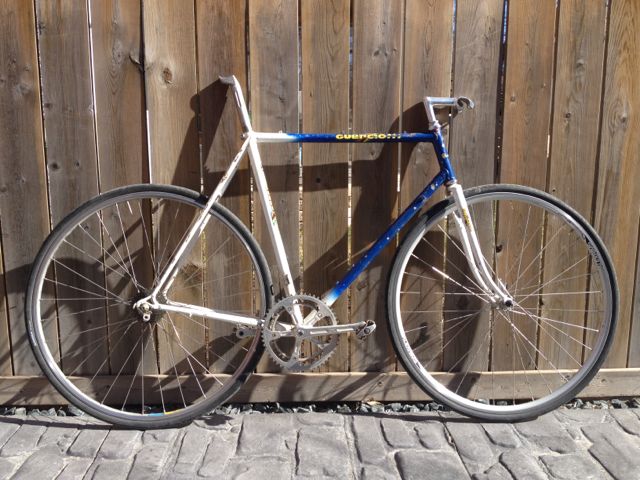 The Guerciotti has arrived! Lyle (the Big Frame) brought it in from the wilds of Altona and confirmed that this is indeed a frame worthy of a rebuild. Coincidentally, it is also a big frame, with a dead horizontal top tube that offers stand over clearance that could be described as “intimate”. There are also some worrisome dents and such, but like any bar bouncer in town will tell you, I am not easily deterred. I may just have to wear high heels when I commute.
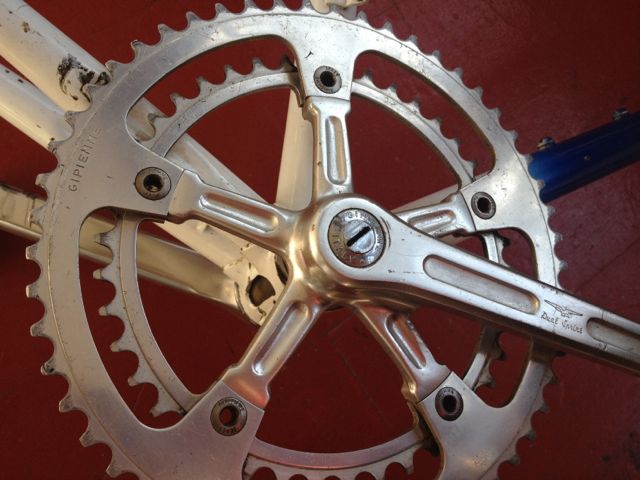
The stem is trashed, having been pried open at some point to remove the handlebars. No matter, a new stem shall be procured.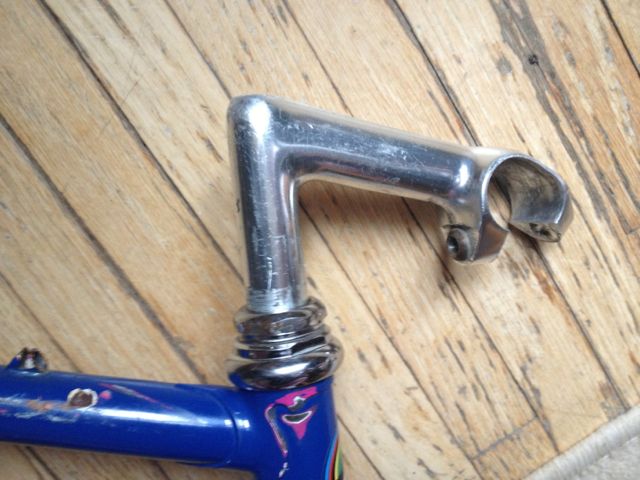 The cranks and chainrings are Gipiemmi, a Milan-based machine shop founded in 1964. Their name is the initials ‘GPM’ pronounced as a word, and according to the interwebs stands for “Gran Premio della Montagna”, the high points on mountain stages of the Giro d’Italia. I bet Sophia Loren bought her bike parts from Gipiemmi.
There is a 53-tooth ring (the bigger one) and a 42-tooth ring, which I understand is an ideal size for a single speed set up. Excellent! But the bigger ring is kind of pretty too, so it has been suggested by Hot Legs Coughlin that the teeth could be filed off and the ring used as a chain/skirt guard. I like that idea a lot, especially since high heels do look best with a skirt.
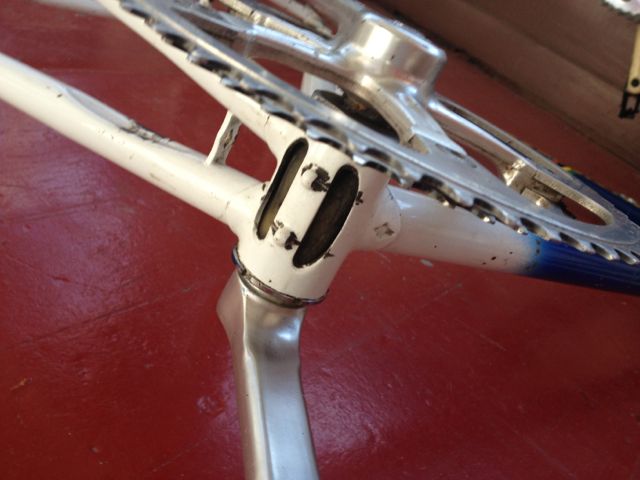
 The frame has some very lovely features and nicely crafted lugs (the bits that hold the frame tubes together). Apparently these drainage cut outs on the bottom are special too.
 I happened to be in Olympia Cycle the other day and was introduced to one of the many Scotts that work there. This particular Scott is young, has a beard, and recently transformed an old Italian steel frame into a commuter. Let’s call him Hipster Scott. Hipster Scott took the time to talk to me about the project and gave me lots of great tips and suggested I bring the frame in to have it checked out before I do any work to it. When I proudly arrived at the shop with my Italian Stallion in tow, Tomek the Polish Bike Mechanic was decidedly nonplussed. “That’s not an Italian Stallion! That is an ugly old Italian man!” Silly Tomek. I’ll show him.
There are also lots of Adrians at the shop, and one of them checked out the frame and forks for alignment, and also tested the scary looking crack at the bottom lug by removing the bottom bracket and dripping some fluid on the crack to see if it seeped right through. No seepage was good news. Adrian also reported that the bottom bracket showed some signs of pitting, and should probably be replaced. Boo. The Italians are famously difficult, and therefore made their bottom brackets different from everybody else. I will require a specially threaded Italian bottom bracket and new Campagnolo spindle – which I may have procured from The Hipster (not to be confused with Hipster Scott), who hoards old Italian bike parts in his parents’ basement along with his various cargo racks and obscure artisan beers.
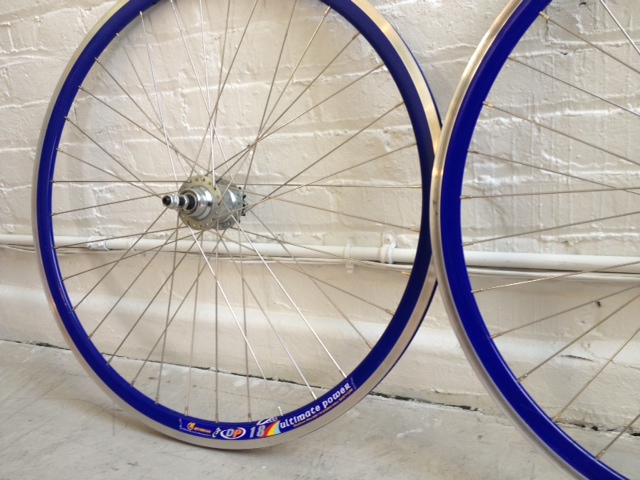
The cost of diagnostic services from the shop? One case of Belgian beauties.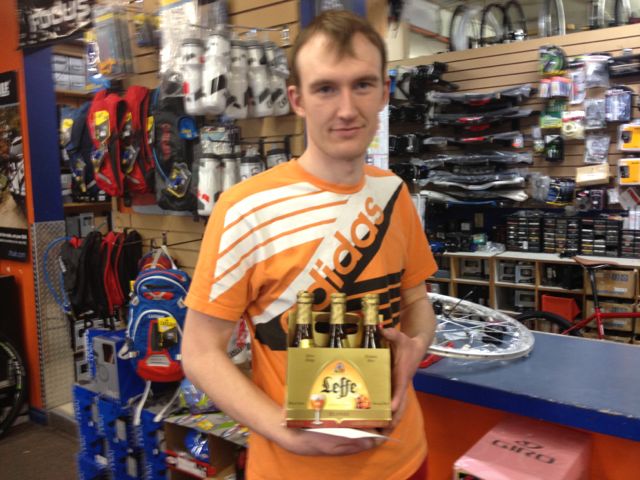 In the meantime a deal was struck with Adam for a sweet pair of lightly-used deep-v wheels. He had bought the wheels for a commuter for his lovely wife Stephanie, then the project was abandoned, along with the wheels. The cost of the wheel set: One bottle of Maker’s Mark whiskey and a case of Stella for the wife.
 The thing about these wheels is the colour. They are blue. Like super blue. This may or may not be an issue, depending on the colour scheme I choose for the bike. More on that in a later, more “fashion-focused” post.
 But it was an offer I could not refuse.
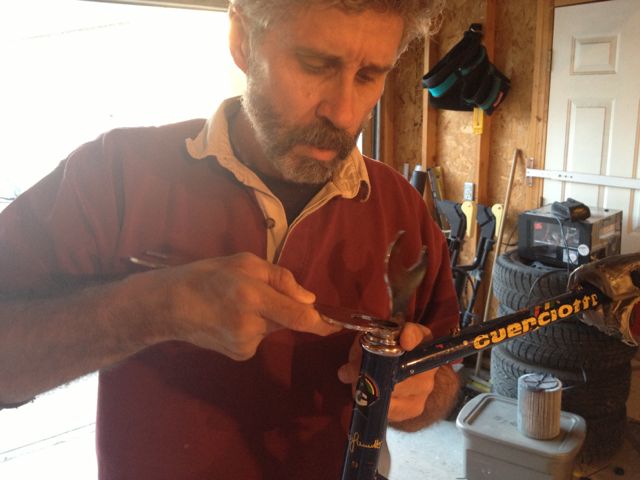
On to more important things – in order to get the frame and forks powder coated, things have to come apart. This is where I start to get in over my head and have to start learning stuff about bikes. The stem, which holds the handlebars, is attached to the forks by the headset. Or something like that. In any case, sometimes over time these things can get rusted together, or even fused, and the only way to get them apart is a hacksaw. Hacksaws and bikes are generally a bad combination. After consulting The Almighty Sheldon Brown to learn a bit about threaded headsets (as opposed to the newfangled threadless ones that are like Duplo blocks in comparison), I determined it was stuck. Headsets are stupid.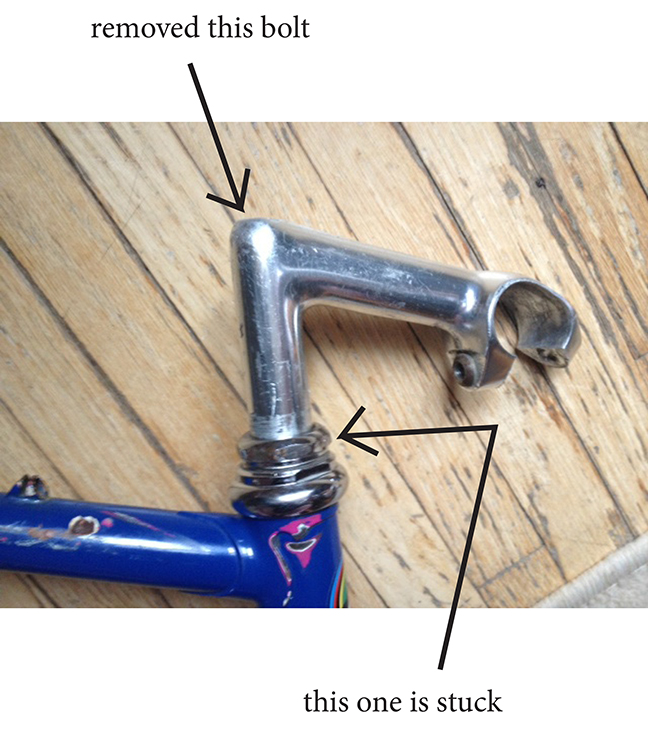 I consulted several members of my wise bike posse, including the Alter Boys and B-Rad, who suggested using a shitload of WD40 and a goodly amount of aggressive hammering.
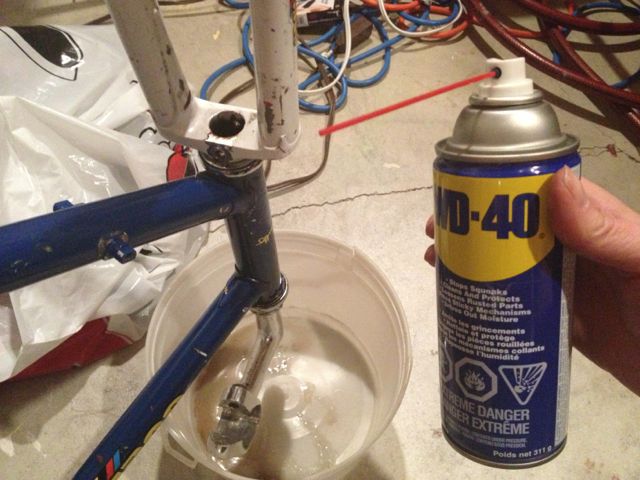 I spent the next two days pounding the hell out of the thing and smelling like garage. My efforts, in addition to being sweaty and smelly, were fruitless. B-Rad came to the rescue, offering his experience and tools to dislodge the stubborn stem. Some clamps, a trailer hitch and a 2×4 did the trick to get things loose, and a final bit of hammering secured our victory once and for all.
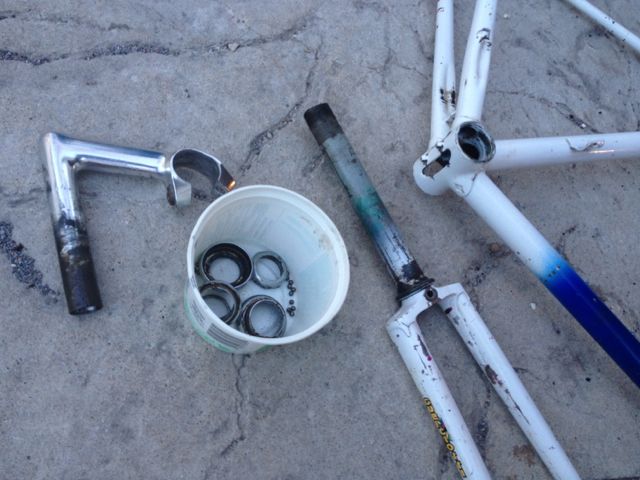 Haha! Take that you stupid bike! You are not the boss of me!
The last bit of business before powder coating was removing the front derailleur hanger, which is an unsightly little thing that will be unnecessary for a single speed set up, given that the only function of a derailleur (other than making my life miserable) is to change gears. No gears, no derailleur. No derailleur, no derailleur hanger. Buh-bye.
 For this task, power tools would certainly be required, and nobody knows power tools like my Dear Old Dad. I brought the frame to Dad, who immediately clamped it into a vice grip for closer examination, then fired up a blow torch.
 I’ll admit this was a little horrifying, but I had no reason not to place full trust in the man who raised me from infancy, having only dropped me on my head once. Or twice.
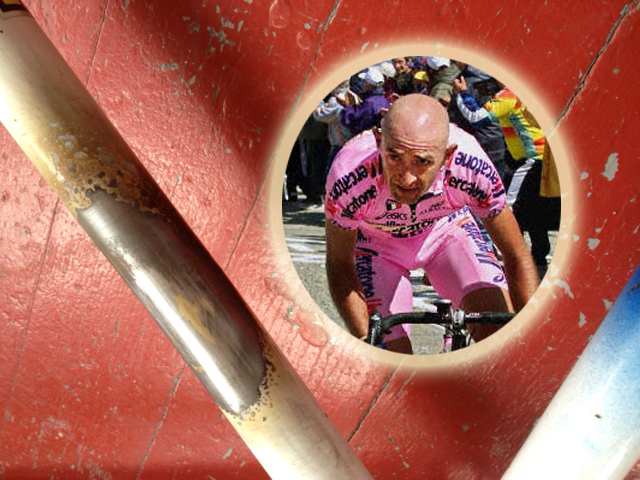
The hanger was attached by the brazing process, where brass (or copper) is melted and used like glue to stick pieces of steel together. Remelting the brass releases the bond, and also makes one unholy mess.  Dad tells me that although the heat would change the chemical properties of the steel, it wouldn’t wreck it, per se, which is most reassuring. Some filing and sanding and the torched area was as clean and smooth as Marco Pantani’s glorious head.
 Whew. It’s been a lot of work already and the frame is in pieces and looks like hell in a handbasket. But like most things like this, it always looks worse before it looks better, and I have full confidence that this old Italian man is well on his way to his former glory.
Next step: powder coating and the rummaging of basements for the procurement of parts. Stay tuned!

Interesting. I have some italian BB parts you’re welcome to, but using a sealed BB with italian threads is the way to go. The old BBs need to be re-packed each year – faster, but a pain for a commuter.
The 53 in a single speed is a head turner. Just use a bigger rear cog. But the skirt argument is good too – however, check the chain line before putting work into the 53 as you may need the outer position on the spyder for the 42 ring to make the chain line work – and that chain line may change if it is a flip flop single free/fixed combo.
Try for cinelli bars/stem – mucho cool. Hard to find now – used to get NOS parts at Nashbar. Never French. Perhaps Zeus – Spain, although they are soft and very hard to find.
Campy brakes are not great for commuters, IMO, as they’re designed for shedding speed in pack riding, not emergency stops. This is one area where non-italian has to give way for safety.
Examine the cranks meticulously. A hairline crack or etch may hide and deeper, weathered crack, especially near any logo etching. There are numerous reports of them failing near the head – Sylvia Burke (sp?) did so famously at the bottom of Darlinford hills in a race.
Villain, on McReary near For Whyte, does an excellent paint job. Just re-did a pink Klein in candy apple red – wonderful. Much better than the industrial place I went to for Sean’s Raleigh.
Thanks Jason, you bring up some good points. I’ve been playing phone, text and email tag with Paul at Villian for a week now. Just have to find a mutually workable time to go down there. Very exciting!
And yes about the Italian (and non-Italian) parts. I’ve got the feelers out looking for the parts I think I need. It’s a pretty long list!
I think your Dad has more shit lying around in his garage than I do. But barely. Gotta clean that up one of these days.
Never trust an over-clean garage.
Great project, cant wait to wee the end result. All things Italian are great and should be preserved or re-purposed!
Amen Michael! I am hopeful I can retore this beauty back to its former pedigree. So far so good!
You’ve already got the wheels, but one thing that ‘might’ be possible to fit over the top tube a bit more is using 650b wheels if you can get long reach brakes to work. Italian bikes of this pedigree would probably refuse to cooperate, but my husband did it with an older lower tier bianchi, tektro ‘silver’ long reach brakes, and cheapo 650b rims. He tried 38mm tires, but will have to go to 32mm. Not sure if you are aware of the magical world of Bicycle Quarterly Press and 650bness, retro classic rando ladeedaa… But long before mountain biking took over 650b, it was long a classic french wheel size.
Those wheels are beautiful though! What tire width can the frame take? Do you plan on riding this year round? Tires appropriate for different seasons? I just can’t imagine riding skinnies on layers of ice, piles of snow etc..
I built up a bomb proof bike with drum brakes which are amazing in gross weather.
Thanks for the info Heather – BQP is a marvel and I had never heard of the 650b wheel size. I do already have the wheels, and will probably stick with them for this project. It’s usefulness as a winter commuter is probably questionable, given the size and very narrow forks. I hope to maybe get 25s with fenders or maybe up to 28s. But it may not like fenders either way. So it will probably be a three season bike, we’ll see.
I found out that mtb tires aren’t so hot on snow – which surprised me. I’ve been told a narrower tire (like 28s) are easier to maneuver, cut through the snow, and wash out less than wider tires. Which explains why I was sliding out so much this winter.
Good idea on the drum brakes. I bet disk would be good too, but fitting them to this frame is more complicated that my poor brain can handle. While this has become a fun project bike, an all weather commuter may be another animal entirely.
Thanks again for the advice!
–WCC
drum brakes, 650B tires, BQ mag? Whoever you are Heather, you are my favourite.
Andrea, I found a quill stem in my stash. It’s not a great stem, but you can have it for free if you like to try out. I also found two campagnolo bottom brackets. One is a track BB, the other is a short road BB. But I do agree with Jason: an Italian-threaded sealed BB would be a lot simpler and probably a lot cheaper too. I’ll bring them to the klubhaus tonight regardless.
I’m arriving a bit late to this post, but it looks like a great project. Once you’re past the decision about keeping everything original, you have a lot more options. If it hasn’t already made it to the powder coaters, you might consider what other torch magic you might want to do first. My main commuter is a 1977 Trek found languishing in the back of a shop stripped and painted with a spray can. Especially here in Arizona, a single water bottle doesn’t cut it. I local frame builder took care of that and then added other nicities like eyelets for racks, fenders and lights, and a little chain keeper. I got the fenders set and they were powder coated at the same time.
When going to powder coating, masking is key to keep it out of places you don’t want, e.g. little tapered plugs for anyplace a bolt goes. Afterwards, it still needed a “chase and face” to really clean up the various threads and give square edges where bottom bracket and headset fit.
Speaking of bottom brackets, Italian threads aren’t as odd as some others out there and are available. For worst-case (e.g. hopelessly fouled threads that can’t be recut) there are thread less bottom brackets, e.g. Velo Orange (who also has a lot of other bits appropriate for older bikes)
The nice thing about a project like this is that it doesn’t have to be finished all at once. After riding it around for a bit, you may decide to give the 650B wheels a go or swap out some other little bit for another you encounter down the road. I hope you enjoy the project and the ride. Cheers!
Hey Kurt, thanks for the advice and encouragement. This project is crazy fun and I am learning tons. I am expecting the frame back from powder coating today, and am assured all the right bits have been masked. I’ve also been collecting all sorts of parts and am anxious to start piecing everything together. Another update coming soon I hope!